The acanthus leaf has been used in paintings, sculptures and carvings for thousands of years. Commonly, the acanthus has been incorporated in ancient Greek and Roman works and has been used to embellish artwork ever since. In this post, we are going to focus on the style of the Arts and Crafts movement, as this translates well into SVG.
Note: whatever vector software you are using, it is wise to save regularly and set up autosave as a backup — losing your work is a frustrating experience and is easily prevented.
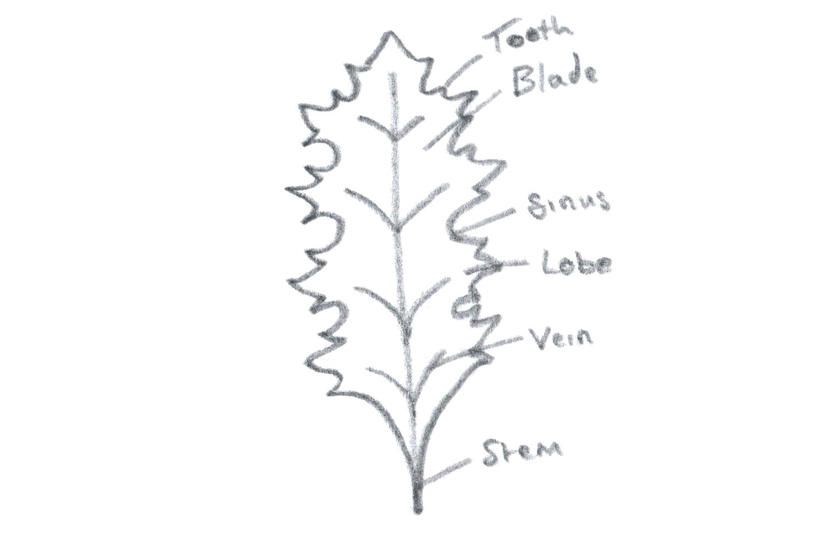
Acanthus leaf anatomy
While the acanthus is a real plant, it’s leaf is often depicted in a more fantastical style. That said, there are some common features which tie these works together.
Forgive my sketch — this image shows the anatomical elements of the acanthus leaf, such as the tooth, blade/lamina, sinus, lobe, vein and stem. Most depictions of the acanthus leaf will include all of these elements.
Notice how the common depiction of the acanthus leaf (shown above) differs from the true leaves of the acanthus.
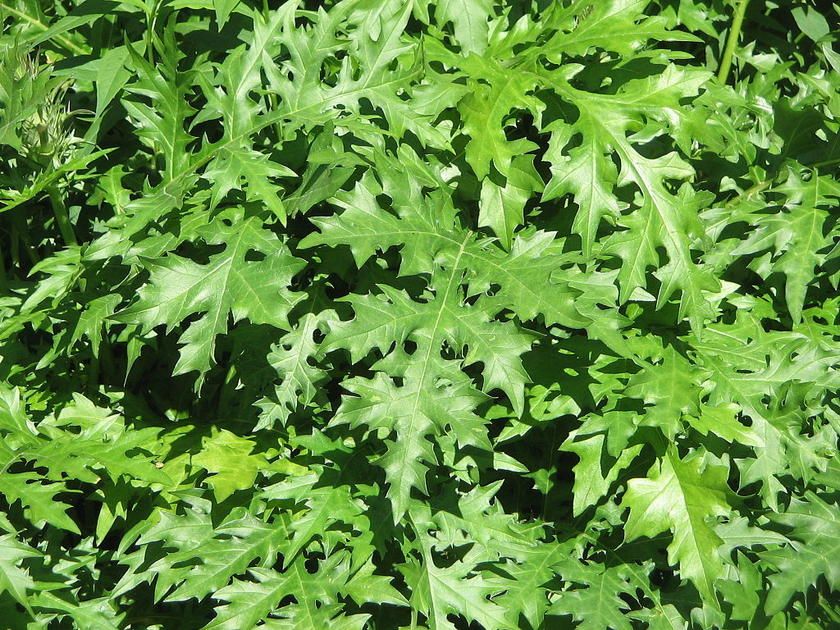 Acanthus Spinosus Leaves
/
Meneerke bloem
/
CC BY-SA
Acanthus Spinosus Leaves
/
Meneerke bloem
/
CC BY-SA
Drawing the acanthus leaf — Arts & Crafts style
While drawing the acanthus leaf — stylistically — might look tricky, I am going to take you through each step and you will see it is actually relatively simple (after a little practise).
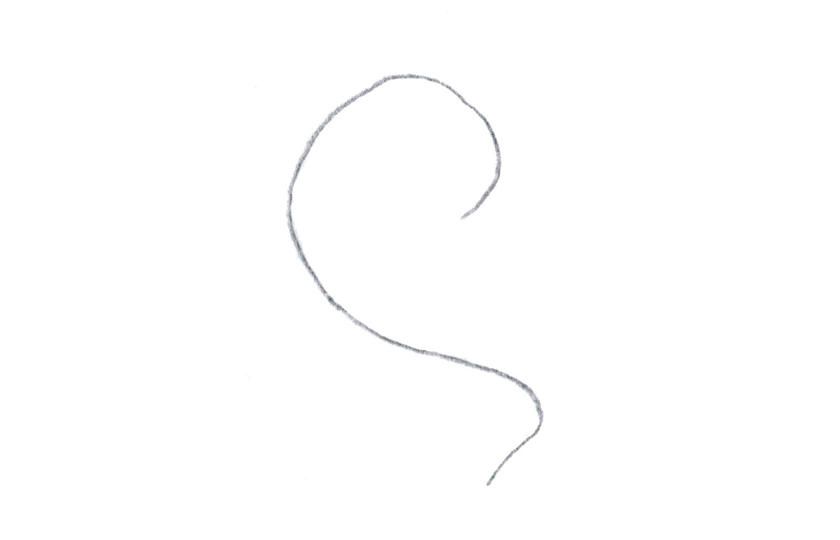
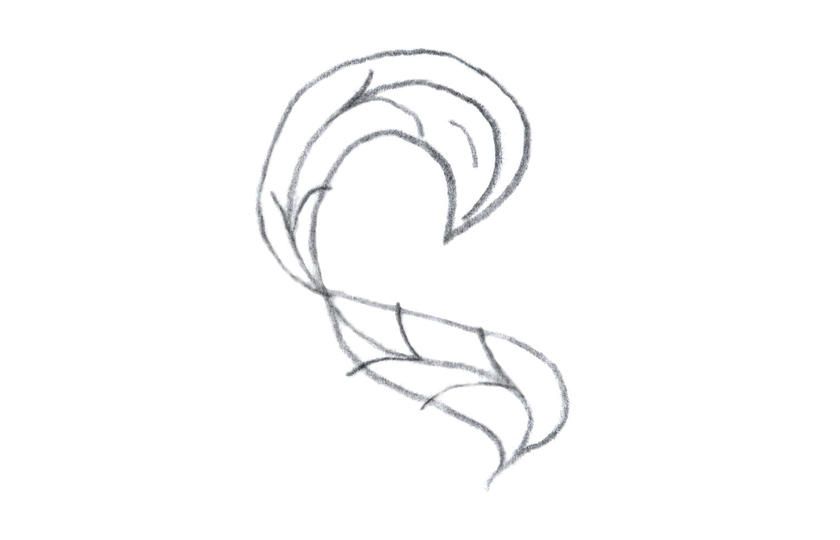
1. Start with the form/movement of the leaf
For the form of the leaf, all you need is a curvy line. This will form the mid-rib of the acanthus leaf and will dictate, to some degree, the shape of the final leaf. You may want to keep the curves simple to start with, as you practise.
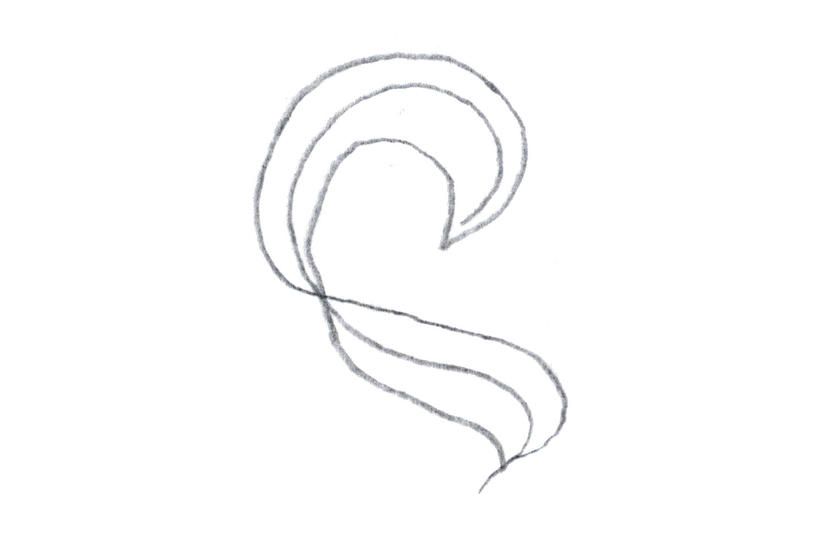
2. Create a simple leaf shape
With the curved line as a template, create a basic leaf shape around it. This is the point where you decide if and where the leave should twist. While twists are slightly more difficult to draw they add more movement and ’life’ to the design.
3. Add the veins
Where you place the veins will dictate where your lobes will be. The more veins you draw, the smaller your lobes and teeth and sinuses will have to be.
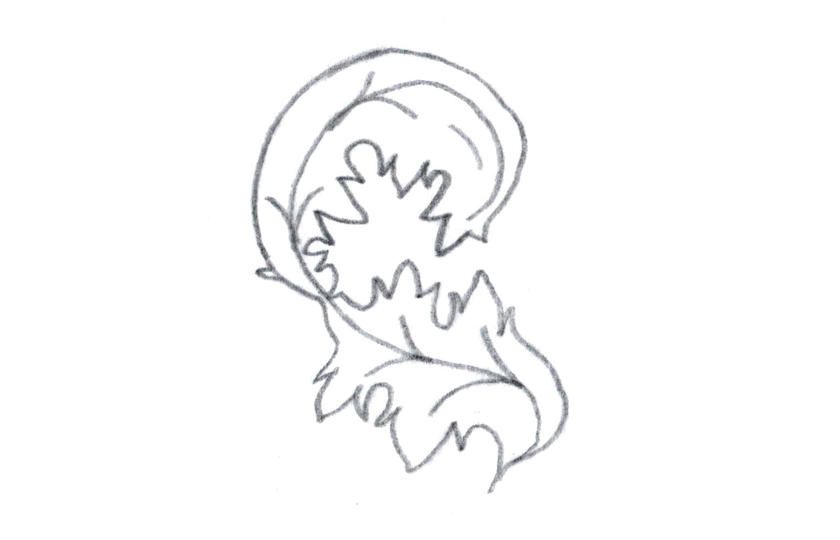
4. Draw the lobes of the leaf
The lobes are perhaps the most challenging part. Remember that the central tooth of each lobe should follow the corresponding vein. The lobes and teeth will add character to your design. If you feel adventurous, you can also twist and bend the lobes for a more dynamic design — I usually draw the lobes simply and alter them afterwards.
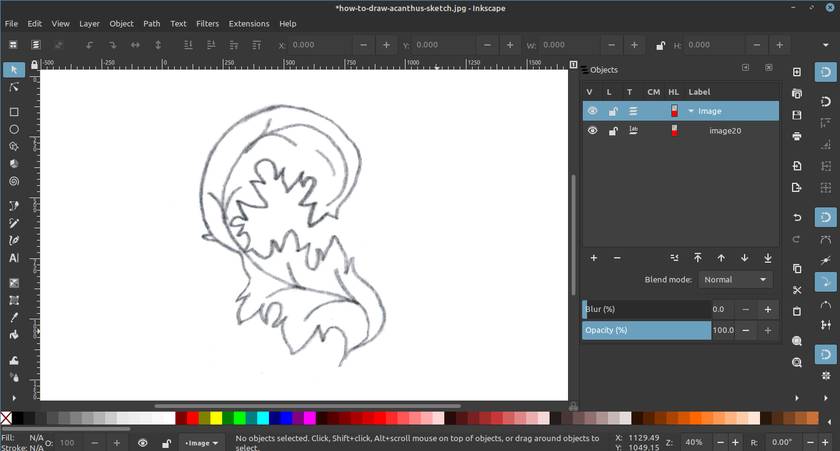
5. Scan your sketch
Use a scanner or a camera to digitise the sketch and open it in Inkscape (note, this can be done in any vector drawing software, but my software of choice is Inkscape).
6. Trace the outer leaf — part 1 (Bezier tool)
I suggest using two contrasting different fill colours — one for the inside and one for the outside. You can change them later. Choose which areas can be drawn in one. For the sake of this demonstration, I have chosen to first separate mine into two shapes.
Using the bezier tool, simply place nodes at very corner and at least one on every curve (for longer or more complex curves you will need more — space them out appropriately).
This is something you will learn with practise, I will show you how I do it.
7. Trace the outer leaf — part 2 (Node tool)
Once you have marked the main points around the leaf sketch with the bezier tool, use the node tool to adjust the points by dragging them and make curves to match the sketch beneath. Double-clicking on a line will add a node and to remove a node, click it and press delete.
If your curves look angular, select the offending node, and click the “make selected nodes smooth” button in the top toolbar.
You might want to use this opportunity to improve upon your design.
8. Trace the mid-rib of the leaf
Using the same method, trace the mid-rib of the leaf with a single line. Once you have the curves in place, you may choose to split them at the point where the leaf turns over, as I have in my demo (below).
To achieve this, select the node tool and with the line selected, double-click at the point where you want the break to create a new node. select the node and click the “Break path at selected node” button on the top toolbar.
9. Shape the mid-rib with “Power Stroke”
You can now give the mid-rib a more attractive shape by using one of Inkscape’s path effects, this is how:
On the top menu, select path > path effects. Then, with the line selected,** click the “+” in the Path Effects panel**, scroll down and click Power Stroke.
Now, with the node tool use the pink dots to manipulate the line thickness.
10. Trace the veins
Go through the same process with the veins, tracing with the bezier pen and then shaping them with Power Stroke. Veins should be visible on both the front and the back of the acanthus leaf.
11. Finalising your design
Once you have finished tracing your leaf, look for any flaws (such as overlapping or incomplete paths). To find them, go to View > Display Mode > Outline. Then, zoom in and fix them.
Note: If you plan to use your designs for the web (in the form of an SVG or for print, it is good practise to convert any strokes and effects to paths. To do this, select your stroke or object (stroke with a path effect in this instance) and go to Path > Stroke to path or Path > Object to Path respectively.
Finally, if you haven’t chosen your colours, now is the time to do it. Make sure that the back of the leaf is distinguishable from the front.

Optionally, play with your design
It can be rewarding to manipulate your acanthus leaf design, bending and twisting the lobes and teeth.
Before you do, save your current design to keep it safe, then use “Save As” to create a new file (filename-v2.svg).
I think you’ll agree, artwork always looks better after a bit of a tweak!

Happy drawing!
I would love to see your work. Please send them to me via the link below. I might even show them on this page as inspiration for others.